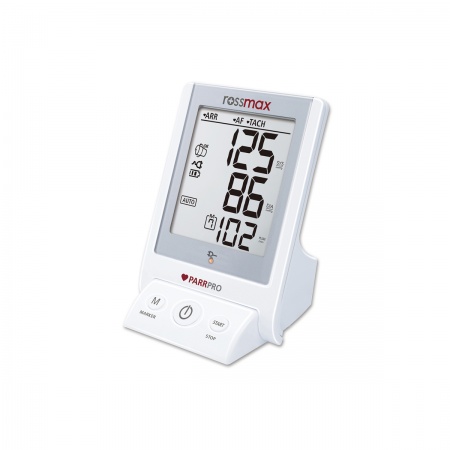
The Rossmax X9 Blood Pressure Monitor is an advanced device created in Switzerland, containing technology designed by a leading Swiss Cardiologist, to provide the user with optimal service and accurate results.
Heart disease is the biggest killer in the UK. As a result, it is important to be vigilant and do regular assessments to check for conditions and monitor the health of your heart and body. The X9 uses PARR technology (Pulse Arrhythmia Technology) to carry out advanced risk assessments, normally only possible through several devices, in one place. This provides the user with an understanding of their risk of cardio diseases and disorders.
The X9 is able to test the risk of:
- Arrhythmia ARR (irregular heartbeat)
- Atrial Fibrillation (Atrial quivers and irregular beating)
- Premature Contractions (Extra, abnormal heartbeats in unusual areas of your heart
- Tachycardia (Fast heart rate of over 100bpm in adults without stress)
- Bradycardia (Slow heart rate of less than 55 bpm in adults without endurance training)
- Hypertension
On the screen it displays the blood pressure, heart rate and also on the left it shows a hypertension risk indicator to clearly state whether there is a high risk (red) or low risk (green).
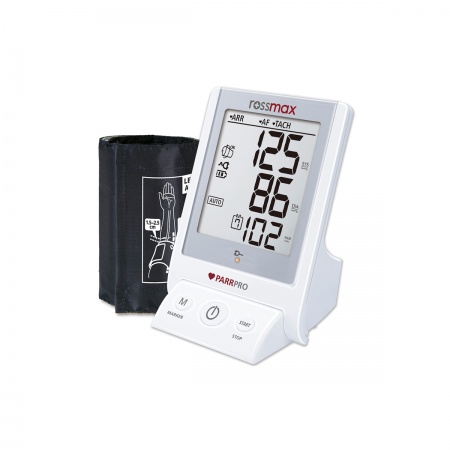
Both Automatic and Auscultatory modes are available to suit all operators. To help get the most accurate results, the X9 has movement and loose cuff detection to let the user know to stay as still as possible or to tighten the cuff. The Rossmax BP monitor can also remember the last 90 readings, which are also downloadable through the USB port.
Making it a leader in accuracy and functionality, the Rossmax X9 BP monitor gives the patient the ability to monitor the health of their heart successfully.
Included is an AC/DC adaptor, storage bag, batteries, 3 different sized cuffs and an instruction manual.
Cuff size guide:
L size: 34~46cm (13.4”~18.1”) M size: 24~36cm (9.5”~14.2”) S size: 16~26cm (6.3”~10.2”)
How to use:
Before you start, remove clothing from the arm area. Rest for a minimum of 3 minutes before testing.
1. Sit down at a table, in a relaxed environment and rest your arm on a firm surface with your feet flat on the floor.
2. Apply the cuff to your upper left arm so that the tube is going downwards towards your ring finger. Insert the plug into the opening on the monitor.
3. Press the Auto/Auscultation switching key to select Auto mode or Auscultation mode. After a measuring mode is selected, press the ON/OFF/START key to reset the monitor so it can start measurement in the chosen measuring mode.
AUTO MODE
1. 'Auto' will appear on the screen and the cuff will start to inflate as the pressure goes up.
2. When the measurement is completed, the cuff will stop inflating and the readings will be shown on the screen.
AUSCULTATION MODE
1. 'Auscultation' will appear on the screen.
2. Make sure you have the stethoscope in place ready, as the cuff will start to inflate.
3. During deflation, press the MARKER key to record the onset of Korotkoff sound as the systolic pressure, and press the MARKER key again to record the disappearance of the Korotkoff sound as diastolic pressure.
4. When completed, the cuff will deflate and the reading will show on the screen.
FREE DELIVERY
All orders automatically have free delivery applied, with no minimum spend required. Order placed with the free delivery option will be delivered within 3 working days.
FASTER SHIPPING
Select one of the Next Day Delivery options at checkout if you would like to receive your order faster. We offer:
UK Royal Mail 24 Hours (only available for some orders) - £5.25
UK Parcelforce Next Working Day Delivery - £5.60
UK Parcelforce Next Working Day by 10:30am - £12.60
UK Parcelforce Next Working Day by 12pm - £9.00
UK Parcelforce Saturday Delivery - £18.00
HOW QUICKLY WILL MY ORDER BE DESPATCHED?
All orders placed Monday-Friday before 2pm are despatched the same day. Orders placed after 2pm, will be despatched the next working day (Mon-Fri). Orders placed after 2pm on a Friday or over the weekend, will be despatched the following Monday (excluding bank holidays).
Kindly note that when your parcel is in the hands of the courier, it is out of our direct control and as such we cannot be held responsible for any delays caused by the courier.
FREE DELIVERY - 2-3 working days
UK Royal Mail 24 Hours - 1-2 working days
UK Parcelforce Next Working Day Delivery - next working day
UK Parcelforce Next Working Day by 10:30am - next working day
UK Parcelforce Next Working Day by 12pm - next working day
UK Parcelforce Saturday Delivery - the next Saturday (orders must be placed before 2pm on Friday, to receive it the next day, Saturday, otherwise it will be delivered the following Tuesday, as it will be despatched on Monday).
INTERNATIONAL DELIVERY
At the moment, we are not delivering outside of mainland UK and Northern Ireland, however, please check back soon as we will be expanding our shipping locations. If you want to order an item to get it to a location outside of the UK, we would suggest using a forwarding company, or you are welcome to organise the postage yourself. If you would like to organise for a shipping company like Hermes, DPD, DHL etc to collect the parcel from us to then deliver to your destination, please get in touch to let us know and we can put the order to the side ready for collection.
FAQ's
How do I track my order?
All our orders can be tracked. Once your order has been despatched, you will receive an email with your tracking information.
The tracking for my order shows it has been delivered but I have not received it. What should I do?
Firstly, we are sorry to hear this. Please contact us on 01403 289370 or email us at sales@syringa-uk.co.uk and we can investigate the location of your package and find a solution for you.
What do I do if I have missed my delivery?
Royal Mail or Parcelforce (depending on the delivery service chosen) should have left a calling card. Please give them a call or visit their site as instructed on the card to book a redelivery or collection. If you have any trouble, please contact us so we can help you.